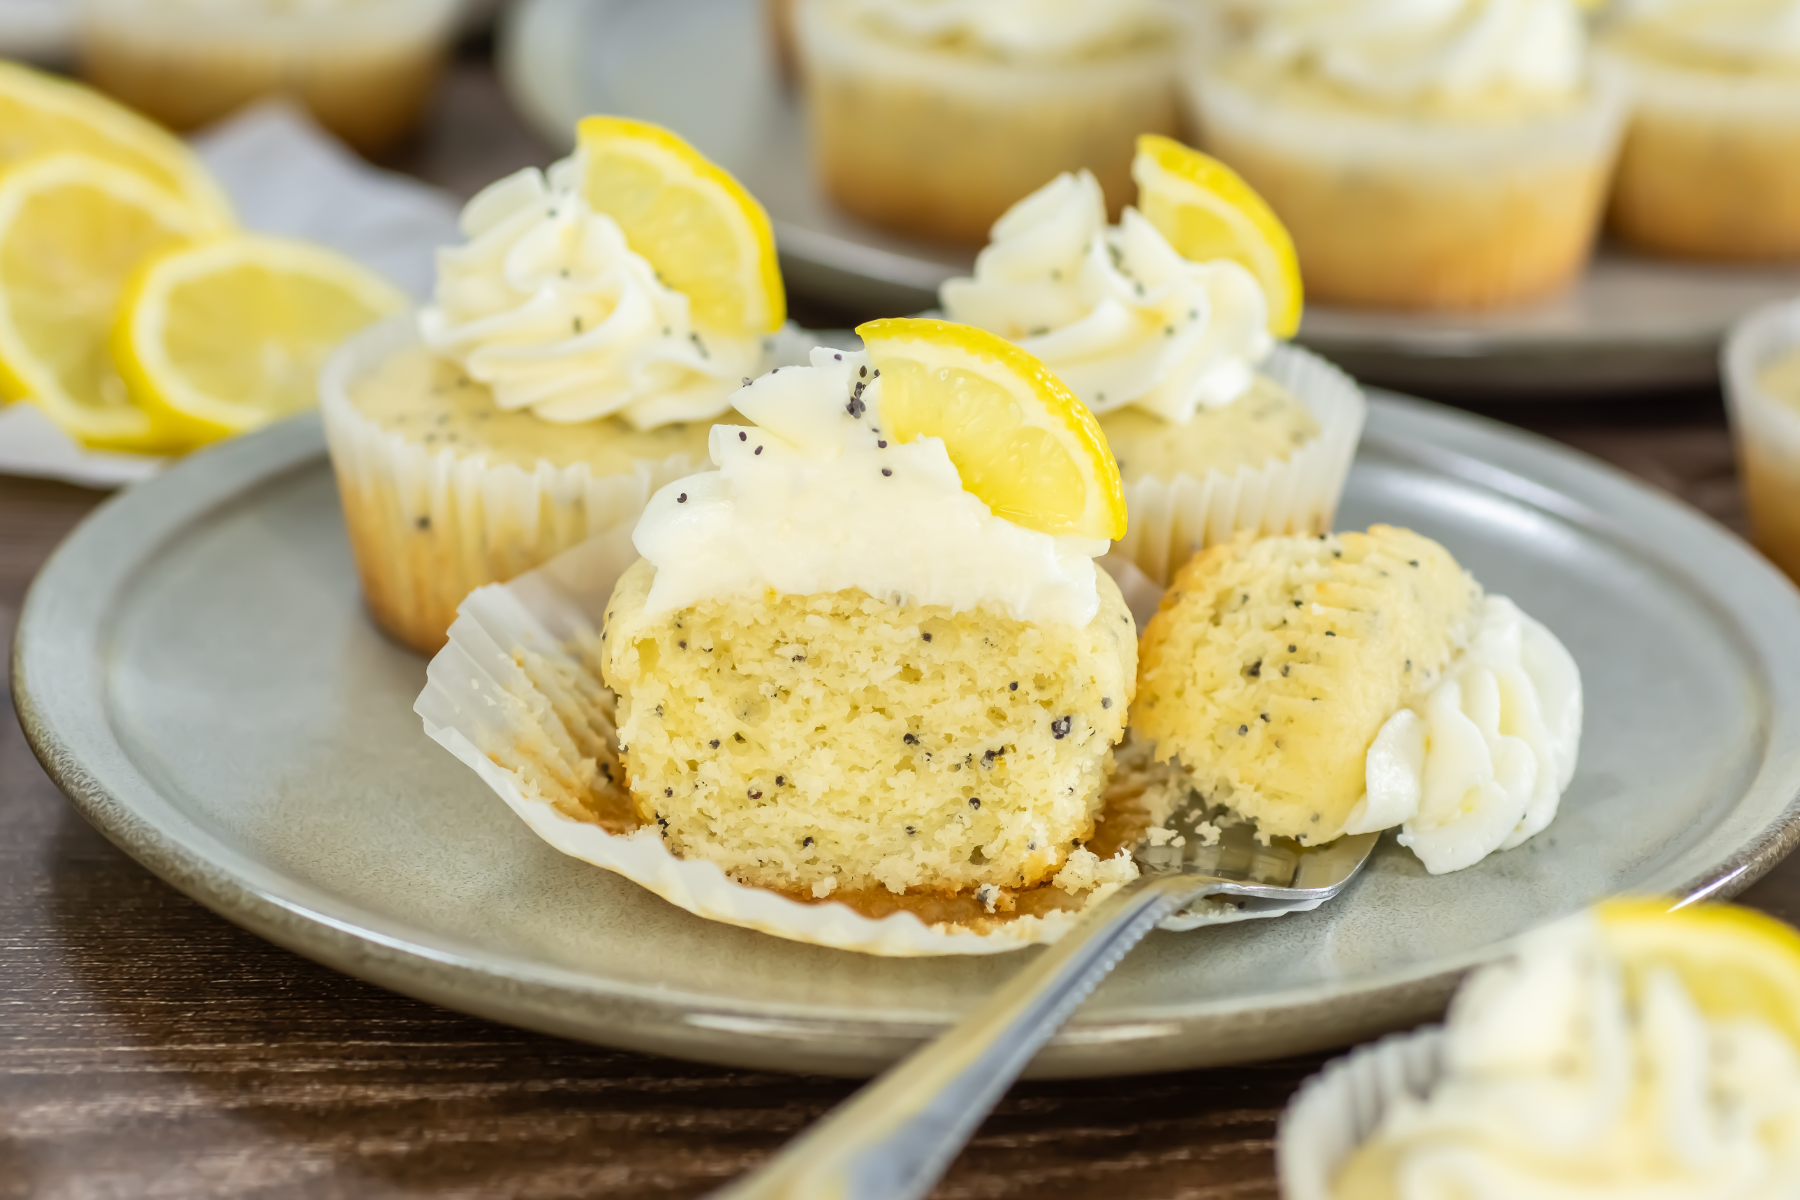
21 Sweet Cheesecake Desserts the Whole Family Will Love
Around here, dessert doesn’t have to be fancy to feel special. Some nights it’s just a little something sweet after dinner while we’re still sitting around the table talking about our day. And if your house is anything like mine, cheesecake is one of those desserts that always gets everyone excited. It’s creamy, comforting, and somehow manages to feel like a treat every single time.
Over the years I’ve realized cheesecake can be surprisingly simple to make at home. Some of these are classic baked cheesecakes, while others are easy no-bake desserts that come together without much effort. A few are fun little twists with fruit, cookies, or chocolate mixed in. They’re the kind of desserts that feel a little special but are still made with everyday ingredients you can grab at the grocery store.
This collection is full of cheesecake desserts that are perfect for family dinners, potlucks, holidays, or those cozy evenings when everyone’s craving something sweet. With mini cheesecakes, fruity favorites, and a few fun treats mixed in, there’s something here for just about every sweet tooth. If your family loves cheesecake as much as mine does, you might want to save a few of these because they have a way of disappearing fast.
Classic & No-Bake Cheesecakes
1. No Bake Mini Coffee Cheesecakes
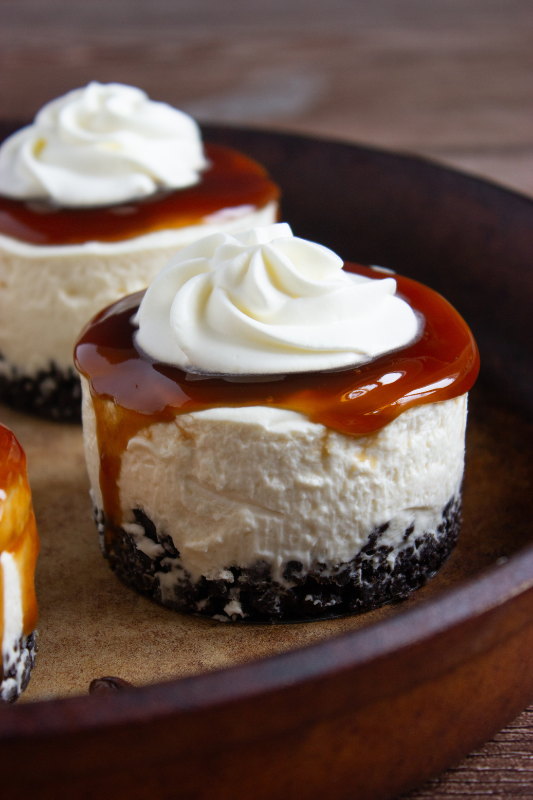
If your house runs on coffee like mine does, this is the kind of dessert that feels like a little treat at the end of a long day. It’s creamy, lightly sweet, and has just enough coffee flavor to make it feel a bit grown-up without being too strong. Since there’s no baking involved, it’s a simple dessert you can put together ahead of time and keep chilled until you’re ready to serve. These little desserts are perfect when you want something comforting, easy, and just a little special to share after dinner.
GET THE RECIPE2. Walking Oreo Cheesecake
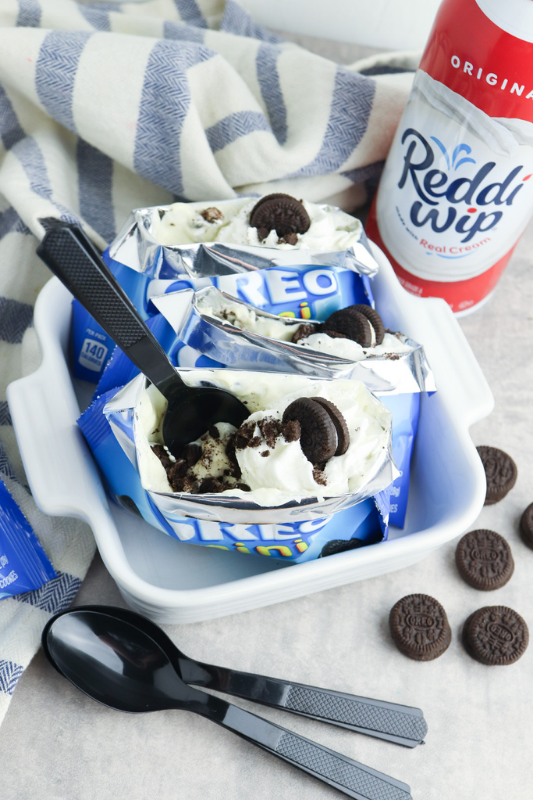
If you’re looking for a dessert that’s a little fun and completely fuss-free, this one always gets a smile around here. It’s creamy, sweet, and full of that classic cookies-and-cream flavor everyone seems to love. Since everything comes together right in the little cookie bags, there’s hardly any cleanup, which is always a win in my kitchen. It’s the kind of simple treat that’s perfect for birthday parties, sleepovers, or any time you want something easy that still feels a little special.
GET THE RECIPE3. Strawberry Cheesecake
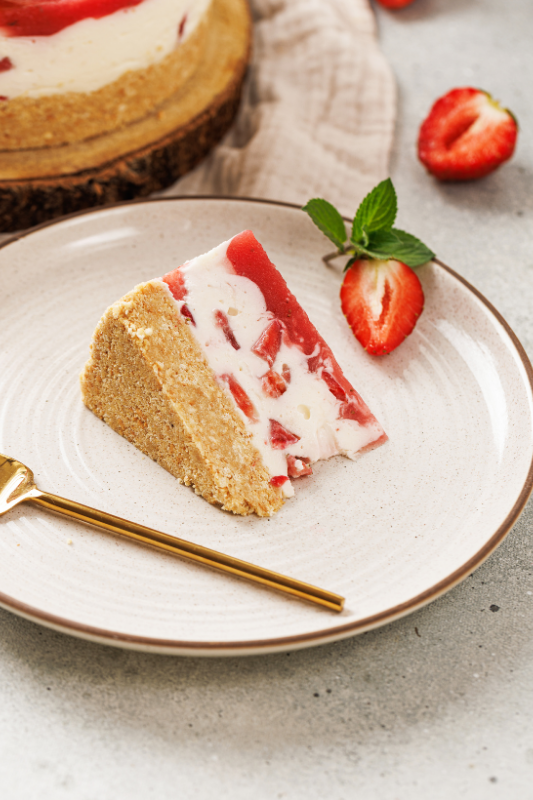
If there’s one flavor that always feels like a treat around here, it’s strawberries and cream. This dessert is creamy, smooth, and just the right mix of sweet and fresh. It’s the kind of thing I like to make when we’re having family over or when everyone’s in the mood for something a little special after dinner. With that buttery crust and the bright strawberry flavor on top, it’s simple, comforting, and always disappears quickly once it hits the table.
Servings: 8-10
Ingredients:
For the Crust:
- 2 cups graham cracker or digestive biscuit crumbs (250g)
- ⅔ cup unsalted butter, melted (150g)
For the Filling:
- 16 oz cream cheese, softened (450g)
- ⅔ cup heavy cream, cold (150ml)
- ½ cup granulated sugar, or to taste (90–100g)
- 1 teaspoon vanilla extract (5ml)
- 1 tablespoon unflavored gelatin (10g)
- 1 cup diced fresh strawberries (150g)
For the Strawberry Swirl Topping:
- 1½ cups fresh strawberries (250–300g)
- 1 tablespoon granulated sugar (to taste)
- 1½ teaspoons unflavored gelatin (5g)
-
Crush the graham crackers or biscuits into fine crumbs and mix them with the melted butter. Press the mixture firmly into the bottom of an 8-inch (20 cm) springform pan to form the crust, then place it in the refrigerator to chill for 20–30 minutes.
-
In a large bowl, beat the cream cheese, sugar, and vanilla together until the mixture is smooth and creamy.
-
In a separate bowl, whip the cold heavy cream until stiff peaks form, then gently fold the whipped cream into the cream cheese mixture until fully combined.
-
Sprinkle the gelatin over 3 tablespoons (45 ml) of water and let it bloom. Warm it gently until dissolved, allow it to cool slightly, and then stir it into the cheesecake filling.
-
Fold the diced strawberries into the filling, stirring gently so the fruit is evenly distributed throughout the mixture.
-
To prepare the topping, blend the remaining strawberries with the sugar until smooth to create a purée.
-
Bloom the gelatin for the topping in 2 tablespoons (30 ml) of water. Warm it until dissolved, let it cool slightly, and stir it into the strawberry purée.
-
Pour the cheesecake filling over the chilled crust and smooth the top with a spatula. Carefully pour the strawberry topping over the surface.
-
Use a toothpick or skewer to gently swirl the topping into the filling to create a marbled effect.
-
Place the cheesecake in the refrigerator and chill for at least 4–6 hours, or overnight, until fully set.
-
Once set, garnish with fresh mint leaves if desired, slice, and serve.
4. No Bake Biscoff Cheesecake
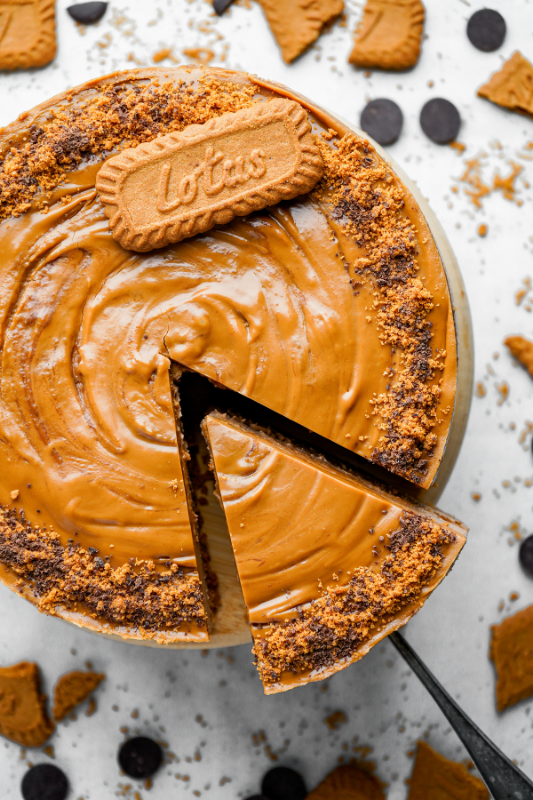
If your family loves those warm, spiced cookie flavors as much as mine does, this is the kind of dessert that always gets people excited. It’s rich, creamy, and layered with that cozy caramel-like flavor that makes every bite feel a little indulgent. Since it comes together without turning on the oven, it’s a great option when you want something homemade but don’t want a lot of extra work. This is the sort of treat I like to make when we’re having friends over or when the kids are hoping for something sweet after dinner.
Servings: 12
Ingredients:
For the Crust:
- 2 cups crushed Biscoff cookies (250 g)
- 7 tbsp unsalted butter, melted (100 g)
For the Filling:
- 16 oz cream cheese, softened (500 g)
- ½ cup granulated sugar (100 g)
- ¾ cup Biscoff spread (200 g)
- 1 tsp vanilla extract (5 ml)
- ¾ cup heavy cream, cold (200 ml)
- ⅔ cup dark chocolate chips, melted (optional) (100 g)
For the Topping:
- ⅓ cup heavy cream (100 ml)
- 3 tbsp Biscoff spread (50 g)
- Crushed Biscoff cookies and chocolate shavings, for garnish
Instructions:
-
Crush Biscoff cookies into fine crumbs and mix with melted butter. Press the mixture firmly into the bottom of a 9-inch (23 cm) springform pan. Chill while you prepare the filling.
-
In a bowl, beat the cream cheese and sugar until smooth. Add the Biscoff spread and vanilla extract, mixing until fully combined.
-
In a separate bowl, whip the cold heavy cream to soft peaks. Gently fold it into the cream cheese mixture. If desired, fold in melted chocolate chips for a chocolate twist.
-
Spread the filling over the crust in two layers. For extra texture, sprinkle crushed Biscoff cookies between the layers. Smooth the top and refrigerate for at least 6 hours or overnight.
-
Warm the heavy cream and Biscoff spread in a small saucepan or microwave until smooth. Let it cool slightly, then pour over the chilled cheesecake.
-
Decorate with crushed Biscoff cookies and chocolate shavings. Slice and serve chilled.
5. No Bake Oreo Cheesecake
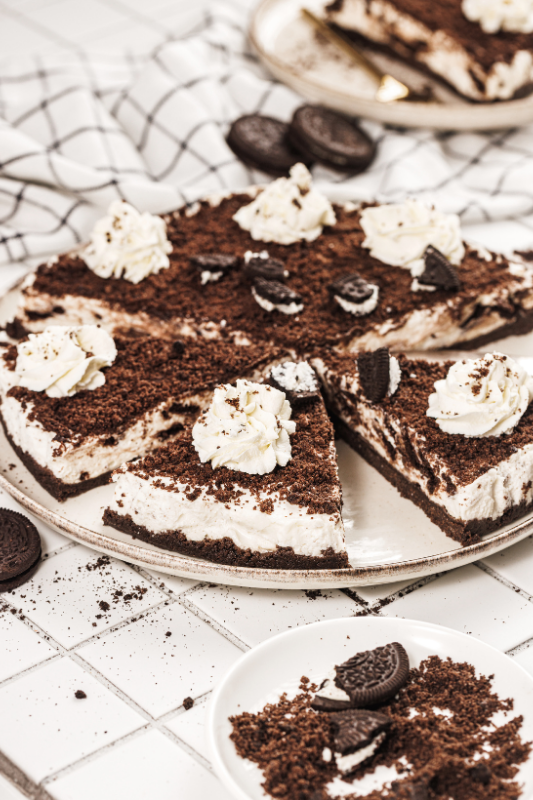
If cookies and cream desserts are a favorite in your house, this one is sure to be a hit. It’s creamy, chocolatey, and full of those familiar cookie flavors that always seem to make everyone happy. Since there’s no baking involved, it’s a simple dessert you can put together ahead of time and keep chilled until you’re ready to serve. Around here, it’s the kind of sweet treat that disappears quickly once everyone grabs a slice.
Servings: 8-10
Ingredients:
For the Crust:
- 2 cups Oreo cookie crumbs (from about 24 cookies) (250 g)
- 6 tbsp unsalted butter, melted (80 g)
For the Filling:
- 14 oz cream cheese, softened (400 g)
- 1 cup heavy cream (33% fat) (250 ml)
- 1 cup powdered sugar (120 g)
- 1 tsp vanilla extract
- 12 Oreo cookies, crushed
For the Topping:
- 3 whole Oreo cookies
- 3–4 tbsp crushed Oreo cookies (for sprinkling)
Instructions:
-
Crush the Oreo cookies into fine crumbs using a food processor or place them in a sealed bag and crush with a rolling pin.
-
Mix the Oreo crumbs with melted butter until evenly combined.
-
Press the mixture firmly into the bottom of a 7–8 inch (18–20 cm) springform pan.
-
Chill the crust in the refrigerator for 20 minutes.
-
In a bowl, whip the heavy cream until soft peaks form.
-
In a separate bowl, beat the cream cheese, powdered sugar, and vanilla extract until smooth.
-
Gently fold the whipped cream into the cream cheese mixture until fully combined.
-
Fold in the crushed Oreo cookies.
-
Spread the filling evenly over the chilled crust and smooth the top with a spatula.
-
Refrigerate for 4–6 hours, or overnight for best results.
-
Sprinkle crushed Oreos over the top for decoration.
-
Arrange whole Oreos on top, either vertically or at an angle.
-
Slice and serve chilled.
6. Mango Cheesecake
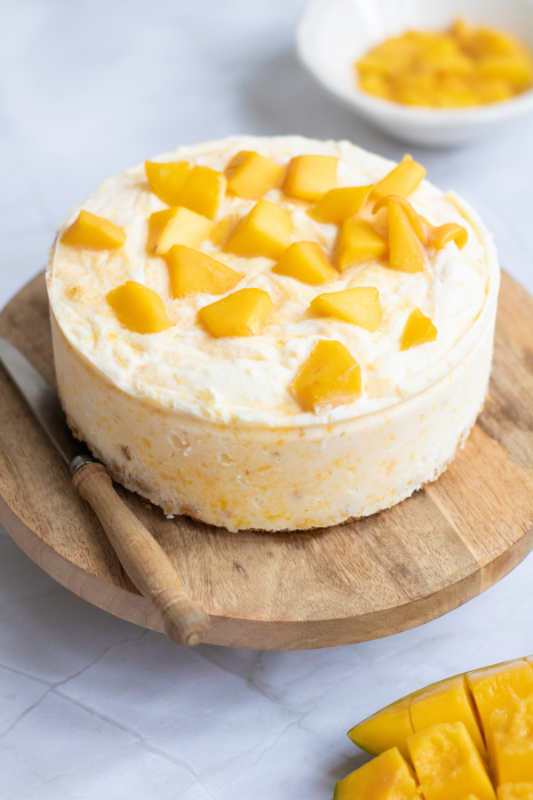
If you’re in the mood for something a little bright and fresh, this is the kind of dessert that always feels like a nice change from the usual chocolate treats. The creamy filling pairs beautifully with the sweet, tropical flavor of mango, giving it a light and sunny feel that’s perfect for warm days or family get-togethers. It’s simple enough to make at home but still feels a little special when you set it on the table. Around here, it’s the sort of dessert that brings everyone back for a second slice.
Servings: 10
Ingredients:
For the Crust:
- 1 ½ cups digestive biscuits crushed into crumbles
- 1/3 cup melted unsalted butter
For the Filling:
- 24 oz (680g) cream cheese, softened
- 1 cup powdered sugar
- 2 teaspoons vanilla extract
- 1 ½ cups mango puree
- 1 tablespoon lemon juice
- 1 ½ cups whipped cream
For the Topping:
- 1 cup diced mango
- 2 tablespoons sugar
- 1 tablespoon lemon juice
Instructions:
-
In a medium mixing bowl, combine the digestive biscuit crumbs with the melted butter.
-
Press the mixture evenly into the base of a springform pan to form the crust.
-
Place the crust in the refrigerator to set while preparing the filling.
-
In a large mixing bowl, beat the cream cheese with a spatula until smooth and softened.
-
Add the powdered sugar and vanilla extract, beating until well combined.
-
Mix in the mango puree and lemon juice until the mixture is smooth.
-
Gently fold in the whipped cream until the filling is light and airy.
-
Pour the filling over the crust and spread it evenly.
-
Refrigerate for at least 4 hours or until set.
-
In a saucepan, combine the diced mango, sugar, and lemon juice.
-
Cook over medium heat until the mango is softened and the sugar has dissolved.
-
Allow the mango topping to cool before spreading it over the chilled cheesecake.
-
Scatter the mango pieces over the cheesecake, slice, and serve.
7. Passion Fruit Cheesecake
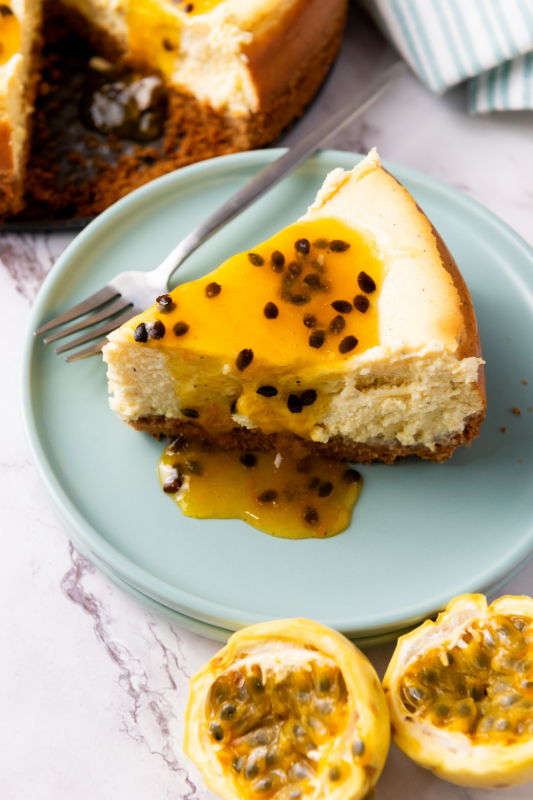
If you’re looking for a dessert that feels a little different from the usual sweets, this one is such a lovely surprise. The creamy filling has that smooth, rich texture we all love, while the passion fruit adds a bright, slightly tangy flavor that keeps every bite feeling fresh. It’s the kind of dessert that looks beautiful on the table but is still simple enough to make at home. Around here, it’s a fun way to bring a little sunshine to the dessert table, especially when we’re sharing a meal with family or friends.
Servings: 12
Ingredients:
Graham Cracker Crust:
- 18 graham cracker (crumbs)
- 1/2 cup unsalted butter, melted
- 1/4 cup granulated sugar
Cheesecake Filling:
- 3 (8 oz) packages cream cheese, softened
- 1 cup granulated sugar
- 1 tsp vanilla extract
- 3 large eggs
- 1/2 cup sour cream
- 1/2 cup heavy cream
- 1/2 cup seedless passion fruit pulp (sifted to remove seeds)
Passion Fruit Coulis Topping:
- ½ cup passion fruit pulp
- ¼ cup sugar
- 1 tablespoon cornstarch
- 1 tablespoon lemon juice
Instructions:
-
Preheat your oven to 350°F (175°C).
-
In a medium bowl, mix graham cracker crumbs, melted butter, and sugar until well combined.
-
Press the mixture evenly into the bottom of a 9-inch springform pan.
-
Bake the crust for 10 minutes, then set aside to cool while preparing the filling.
-
Lower the oven heat to 325°F (160°C).
-
Cut the passion fruits in half and scoop the pulp into a fine mesh sieve placed over a bowl. Press the pulp through the sieve with the back of a spoon to extract the juice and pulp, leaving the seeds behind.
-
In a large bowl, beat the cream cheese and sugar together until smooth and creamy.
-
Add the vanilla extract and mix until combined.
-
Add the eggs one at a time, beating well after each addition.
-
Mix in the sour cream and heavy cream until fully incorporated.
-
Sift and fold in the seedless passion fruit pulp until evenly distributed.
-
Pour the cheesecake filling over the cooled crust and smooth the top with a spatula.
-
Bake the cheesecake in the preheated oven for 60 minutes, or until the center is almost set (it should still be slightly jiggly in the middle).
-
Turn off the oven, crack the door open, and let the cheesecake cool in the oven for 1 hour.
-
Remove the cheesecake from the oven and let it cool completely at room temperature, then refrigerate for at least 4 hours or overnight.
-
In a small saucepan, combine the passion fruit pulp and sugar.
-
Cook over medium heat until the sugar is dissolved.
-
In a small bowl, mix the cornstarch with the lemon juice to make a slurry.
-
Add the cornstarch slurry to the passion fruit mixture, stirring constantly until it thickens, about 3-5 minutes.
-
Remove from heat and let the passion fruit coulis cool to room temperature.
-
Once the cheesecake is set, pour the cooled passion fruit coulis over the top, spreading it evenly.
-
Refrigerate the cheesecake for another hour to allow the topping to set.
-
Carefully remove the cheesecake from the springform pan and transfer it to a serving plate.
-
Slice and serve chilled.
8. No Bake Vanilla Cheesecake
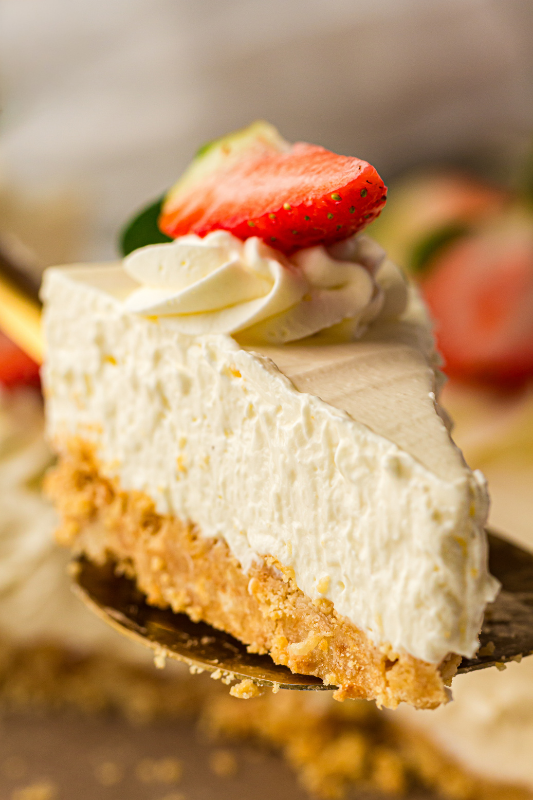
Sometimes the simplest desserts are the ones everyone loves the most. This one is smooth, creamy, and full of that classic vanilla flavor that never goes out of style. Since there’s no baking involved, it’s an easy dessert to put together ahead of time and keep chilled until you’re ready to serve. It’s a sweet treat that fits right in at a family dinner, a holiday gathering, or a quiet evening at home when everyone is ready for something a little special.
Servings: 8
Ingredients:
- 1½ cups graham cracker crumbs (about 200 g crushed graham crackers)
- ½ cup (100 g) melted butter
- 14 oz (400 g) cream cheese, room temperature
- ¾ cup powdered sugar (about 90 g)
- 1 tsp vanilla extract
- 1 cup cold heavy cream (240 ml)
- Optional topping: whipped cream and fresh strawberries
Instructions:
-
In a mixing bowl, stir together the graham cracker crumbs and melted butter until the crumbs are evenly coated.
-
Press the mixture firmly into the bottom of a 9-inch (23 cm) springform pan to form the crust. Place the pan in the refrigerator to chill while you prepare the filling.
-
In a large bowl, add the cream cheese, powdered sugar, vanilla, and cold heavy cream.
-
Beat the mixture until it becomes smooth, thick, and creamy. Continue mixing until the filling looks light and fluffy and holds its shape.
-
Spoon the filling over the chilled crust and spread it evenly across the top.
-
Place the cheesecake in the refrigerator and chill for at least 4 hours, or until the filling is completely set.
-
Before serving, pipe whipped cream around the edges and add fresh strawberries on top if you like.
9. No Bake Easter Egg Cheesecakes
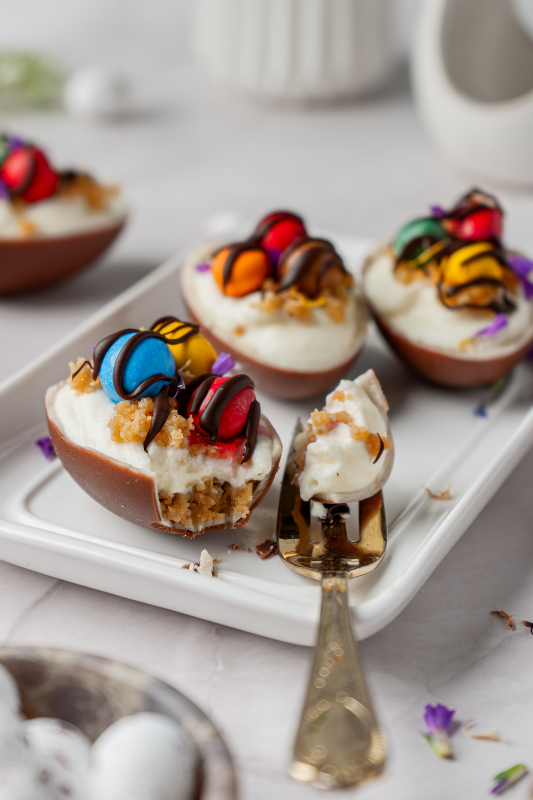
If you’re looking for a dessert that feels a little extra fun for spring gatherings, this one is always a sweet surprise. The creamy filling sits inside chocolate egg shells with a simple cookie crust tucked underneath, which makes each little dessert feel like its own special treat. They’re simple to put together and look so pretty on the table, especially with a few mini eggs or a drizzle of chocolate on top. It’s the kind of dessert that brings smiles the moment everyone sees it.
Servings: 6
Ingredients:
Chocolate Shells:
- 3 hollow chocolate Easter eggs (about 0.7 oz / 20 g each)
Cookie Crust:
- 1/2 cup graham cracker crumbs, digestive biscuits, or crushed cookies (50 g)
- 2 tablespoons (1/8 cup) unsalted butter, melted (30 g)
Cheesecake Filling:
- 4 oz cream cheese, softened (113 g)
- 2 tablespoons (⅛ cup) powdered sugar (15 g)
- 1/4 cup cold heavy whipping cream (60 ml)
- 1/2 teaspoon vanilla extract
- Pinch of salt (optional)
Toppings (Optional):
- The rest of the cookie crust
- Mini chocolate eggs
- Melted chocolate, for drizzling
- Edible flowers (such as pansies or violas)
Instructions:
-
Unwrap the chocolate eggs. Dip a sharp knife in hot water, wipe it dry, and carefully score along the seam of each egg. Repeat this a few times until the eggs separate cleanly into halves, then set the shells aside.
-
In a small bowl, combine the cookie crumbs with the melted butter and stir until the mixture resembles damp sand.
-
Divide the crumb mixture evenly between the chocolate egg halves, pressing it down gently to create a firm crust layer.
-
In a mixing bowl, beat the cream cheese and powdered sugar together until smooth and creamy.
-
In a separate bowl, whip the cold heavy cream with the vanilla extract until stiff peaks form.
-
Gently fold the whipped cream into the cream cheese mixture, mixing until everything is fully combined and light.
-
Spoon or pipe the cheesecake filling over the cookie bases, filling each chocolate shell to the top and smoothing the surface if desired.
-
Place the filled eggs in the refrigerator and chill for at least 4 hours, or until the filling is set.
-
Once chilled, sprinkle the tops with the remaining cookie crumbs, drizzle with melted chocolate, and add mini chocolate eggs or edible flowers if using. Serve cold.
10. Mini Springtime Cheesecakes
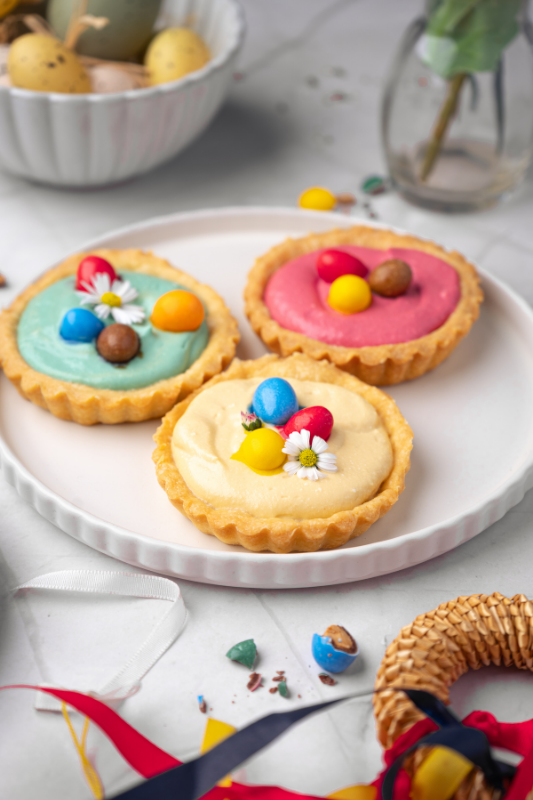
When spring rolls around, I always find myself reaching for desserts that feel light, cheerful, and a little bit fun to share. These little treats are just the right size for gatherings, and they look so pretty on the table with their soft colors and creamy filling. They’re simple to make with everyday ingredients, which is always my favorite kind of recipe. When I set these out after dinner or bring them to a family get-together, they tend to disappear quickly because everyone loves having their own little dessert.
Servings: 8
Ingredients:
For the sweet short pastry shell:
- 4 cups (500 g) pastry flour, plus extra for dusting
- 1 ⅔ cups (375 g) unsalted butter, at room temperature
- 1 teaspoon (5 mL) salt
- 1 large egg yolk
- 2 teaspoons (10 mL) sugar
- 7 tablespoons (105 mL) whole milk, room temperature
For the cheesecake-style filling:
- 12 oz (340 g) cream cheese, softened at room temperature
- 4 teaspoons (20 mL) fresh lemon juice
- ½ cup (50 g) powdered sugar
- ½ cup (≈120 mL) heavy cream
- 1 teaspoon vanilla extract
- 1 drop gel food colouring of your choice
- Optional: small Easter chocolate eggs or edible flowers to garnish
Instructions:
-
In a large mixing bowl or food processor, combine the softened butter, salt, egg yolk, sugar, and milk. Mix until the mixture is smooth and creamy.
-
Sift the flour and gradually add it to the butter mixture, mixing just until the dough starts to come together. If using a food processor, pulse until the dough forms a ball.
-
Turn the dough onto a lightly floured surface and knead gently for a minute or two until it is smooth and uniform. Shape it into a disk, wrap tightly in plastic wrap, and place it in the refrigerator to chill for at least 2 hours.
-
Preheat the oven to 350 °F / 180 °C and generously butter eight 4-inch tart pans.
-
Roll the chilled dough out on a lightly floured surface, ideally between two sheets of parchment paper, until it is about ¼-inch (6 mm) thick.
-
Cut circles slightly larger than the tart pans and gently press the dough into each pan, trimming away any excess from the edges.
-
Line each tart shell with parchment paper and fill with baking beans or rice for blind baking. Prick the dough several times with a fork, place the pans on a baking sheet, and bake for about 30 minutes until the crusts are lightly golden. Remove from the oven and allow them to cool completely on a wire rack.
-
In a medium bowl, beat the cream cheese, lemon juice, and powdered sugar together until smooth and creamy.
-
In a separate bowl, whip the heavy cream with the vanilla extract until soft peaks form, then gently fold it into the cream cheese mixture until fully combined.
-
Divide the filling into two or more bowls and add a drop of gel food coloring to each, stirring until you achieve soft pastel shades.
-
Once the tart shells have cooled completely, spoon or pipe the colored cheesecake filling into each shell, filling them almost to the top.
-
Place the filled tarts in the refrigerator for at least 2 hours so the filling can firm up and the flavors can come together.
-
Just before serving, decorate each tart with mini chocolate eggs or edible flowers for a festive Easter finish.
11. Patriotic Red, White & Blue Mini Cheesecakes
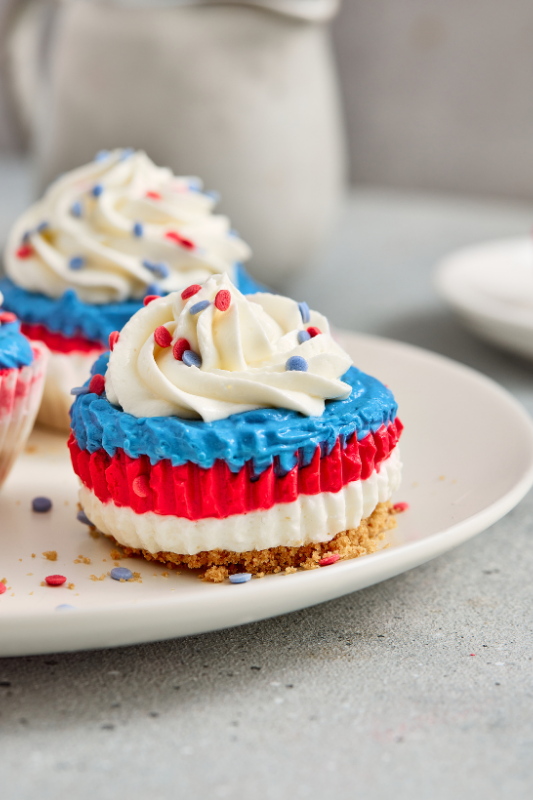
When summer gatherings start popping up on the calendar, I always like having a dessert that feels festive but still simple to make. These little treats are creamy, colorful, and just the right size for sharing at cookouts, family dinners, or holiday get-togethers. The bright layers make them look extra special, but they’re made with everyday ingredients and come together without much fuss. Set a tray of these on the table and you’ll see how quickly everyone reaches for one.
Servings: 12
Ingredients:
For the Crust:
- 1 cup (100 g) crushed cookies or graham crumbs
- 1 tbsp granulated sugar
- 3 tbsp melted butter
For the Cheesecake Filling:
- 500 g cream cheese, softened
- ½ cup (100 g) granulated sugar
- Red and blue gel food coloring
For the Topping:
- 1 cup cream cheese
- 2–3 tbsp powdered sugar
- Red, white & blue sprinkles
Instructions:
-
Preheat the oven to 350°F (180°C) and line a muffin pan with paper liners.
-
In a bowl, combine the crushed cookies, granulated sugar, and melted butter. Stir until the mixture resembles wet sand.
-
Spoon the crumb mixture into each muffin liner and press it down firmly to form the crust.
-
Bake the crusts for 5–6 minutes, just until they begin to set, then remove from the oven and allow them to cool completely.
-
In a large bowl, beat the cream cheese with the remaining sugar until the mixture is smooth and creamy.
-
Divide the filling evenly into three separate bowls.
-
Leave one bowl plain, tint one bowl with red gel food coloring, and tint the third bowl with blue gel food coloring. Stir each bowl until the color is evenly mixed.
-
Spoon the fillings into the muffin liners, layering them in the following order: white, red, then blue.
-
Smooth the tops gently and place the cheesecakes in the refrigerator to chill for at least 4 hours, or overnight for best results.
-
In a bowl, beat the cream cheese and powdered sugar together until smooth and fluffy.
-
Transfer the mixture to a piping bag.
-
Once the cheesecakes are fully chilled, pipe the cream topping onto each one and finish with red, white, and blue sprinkles. Keep refrigerated until ready to serve.
12. No Bake Christmas Cookie Cheesecake
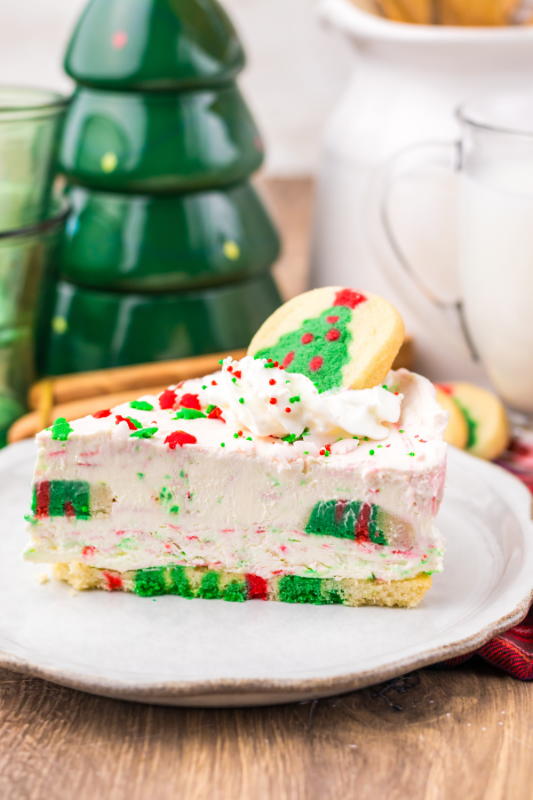
During the holidays I always like having a dessert that feels a little festive without keeping me in the kitchen all day. This one has that creamy, cozy sweetness everyone expects from a holiday treat, with bits of cookie mixed in that make every bite feel a little special. It’s simple to put together ahead of time, which is always helpful when the kitchen is already busy with dinner and all the other holiday baking. Set this out after a family meal and it quickly becomes the dessert everyone is talking about.
GET THE RECIPE13. Mini Santa Cheesecakes
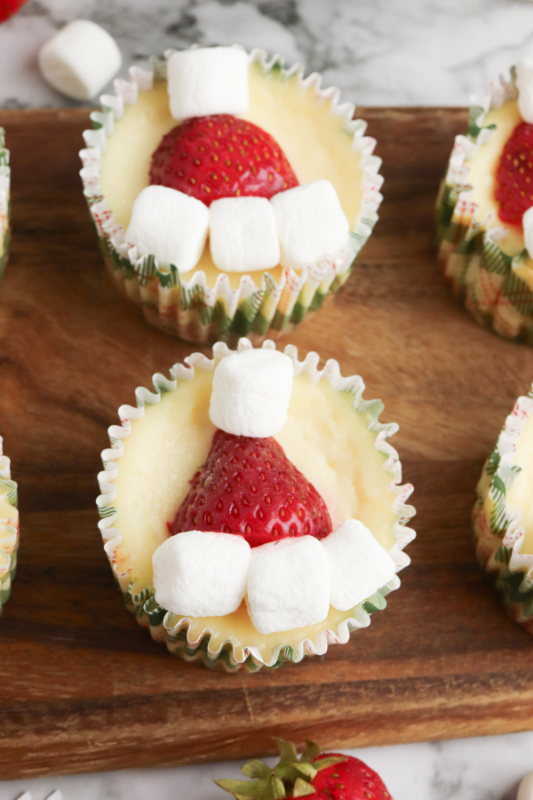
When the holidays roll around, I always love adding a few desserts to the table that feel just as fun as they are delicious. These little treats are one of those recipes that instantly make people smile, especially when the kids see them. With their creamy filling, buttery graham cracker crust, and those cute strawberry “Santa hats” on top, they’re just perfect for Christmas parties, cookie trays, or a festive family dessert. They’re simple to make, look adorable on the table, and always seem to disappear quickly once everyone grabs one.
GET THE RECIPECheesecake Bars & Bites
14. Churros Cheesecake Bars with Cajeta
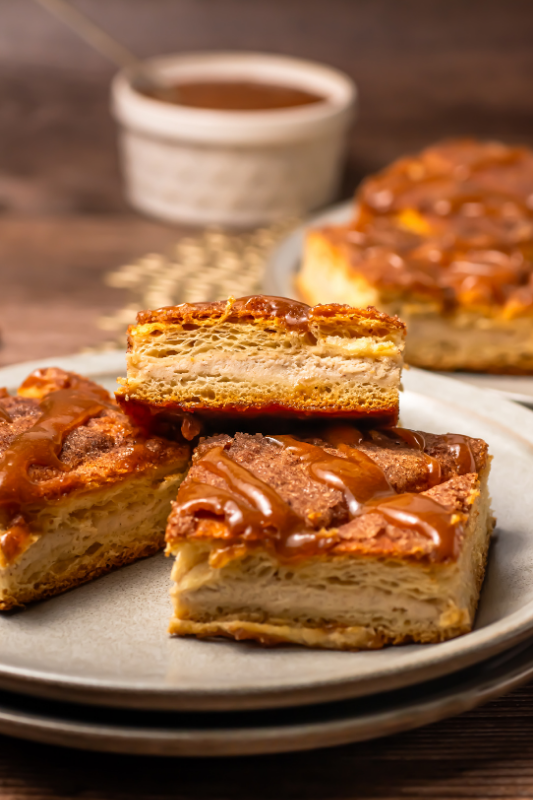
If your family enjoys those warm cinnamon-sugar flavors that remind you of fresh churros, this dessert is such a fun treat to bring to the table. The creamy cheesecake layer is tucked between soft, buttery dough and finished with that sweet cinnamon topping that makes the whole kitchen smell amazing while it bakes. A drizzle of rich caramel sauce over the top adds the perfect finishing touch. It’s one of those comforting desserts that feels a little special but is still simple enough to make for a family gathering or weekend treat.
15. Strawberry Cheesecake Truffles
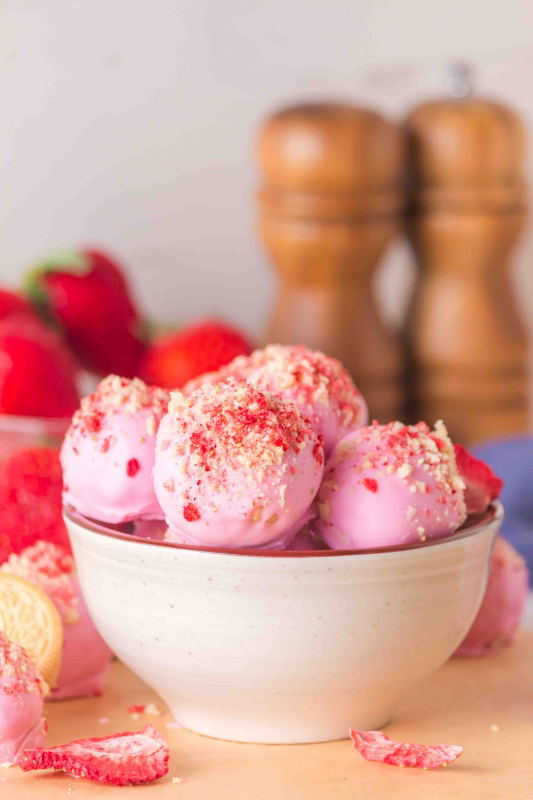
If you’re looking for a dessert that feels a little special but still easy to make, these sweet little bites are always a hit. They have that creamy cheesecake flavor everyone loves, with a soft center and a smooth chocolate coating on the outside. The touch of strawberry adds a bright, fruity flavor that pairs so nicely with the cookies and cream cheese. They’re perfect for parties, holiday trays, or those moments when you want to put out something sweet that people can grab and enjoy in just a bite or two.
Cheesecake-Inspired Desserts
16. Raspberry Cheesecake Filled Donuts
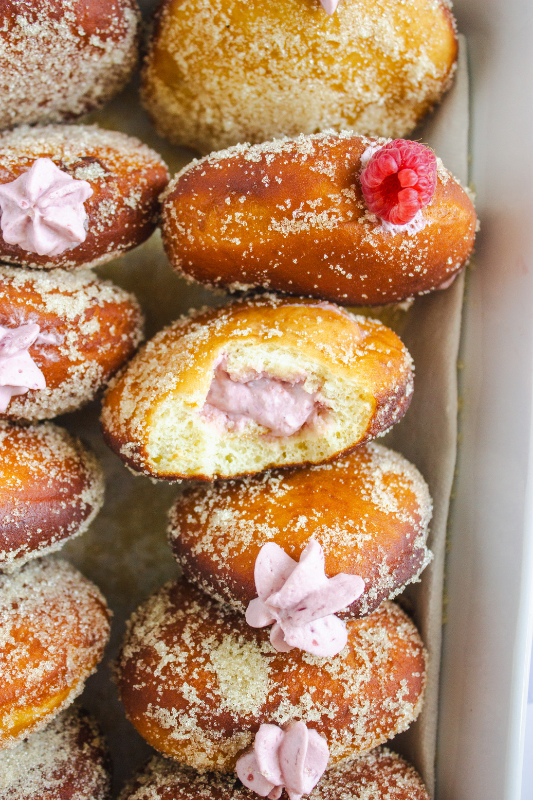
If your family gets excited when fresh donuts show up in the kitchen, this is the kind of dessert that feels extra special. The soft, fluffy dough is filled with a creamy cheesecake mixture and a bright raspberry flavor that makes every bite taste like a little treat. They’re sweet, comforting, and just the sort of homemade dessert that makes the house smell amazing while you’re making them. Set a plate of these on the table and don’t be surprised if everyone reaches for one right away.
Servings: 18
Ingredients:
For the Donut Dough:
- 2 ¼ tsp (1 packet) active dry yeast
- ¾ cup whole milk, warm (about 110°F / 43°C)
- 2 tbsp sugar (for yeast activation)
- 2 large eggs
- ¼ cup sugar (separate from above)
- 3 tbsp unsalted butter, softened
- 1 tsp vanilla extract
- ½ tsp salt
- 3 ½ cups all-purpose flour (start with 3 cups, add more as needed)
- Vegetable oil (for frying)
- Granulated sugar (for rolling)
For the Raspberry Cheesecake Filling:
- ¾ cup heavy cream, cold
- 8 oz cream cheese, softened
- ¼ cup powdered sugar
- 1 tsp vanilla extract
- ⅓ cup raspberry jam or puree (strained if seedy)
Instructions:
-
In a large bowl, combine the warm milk, 2 tablespoons of sugar, and the yeast. Let the mixture sit for 5–10 minutes until it becomes foamy.
-
Add the eggs, the remaining ¼ cup of sugar, vanilla extract, and butter to the yeast mixture. Stir until everything is well combined and smooth.
-
Gradually mix in the flour and salt until a soft dough begins to form.
-
Turn the dough onto a lightly floured surface and knead for 8–10 minutes until smooth and slightly tacky. You can also knead it in a stand mixer with a dough hook for about 5 minutes.
-
Place the dough in a lightly oiled bowl, cover it, and let it rise in a warm place until it doubles in size, about 1 to 1½ hours.
-
Roll the dough out to about ½ inch thick. Cut out rounds about 2½ to 3 inches in diameter and place them on a parchment-lined baking tray. Cover and allow them to rise again until puffy, about 45 minutes.
-
Heat oil to 340–350°F (170–175°C). Fry 2–3 donuts at a time, turning once, until they are deep golden brown. Remove from the oil and drain on paper towels.
-
While the donuts are still warm, roll them in granulated sugar to coat.
-
In a chilled bowl, whip the heavy cream until stiff peaks form and set it aside.
-
In another bowl, beat the cream cheese, powdered sugar, and vanilla extract until smooth and creamy.
-
Fold in the raspberry jam, and if using, the mashed raspberries.
-
Gently fold the whipped cream into the mixture until the filling is light and fluffy.
-
Refrigerate the filling for about 30 minutes so it firms up before piping it into the donuts.
17. White Chocolate Raspberry Cheesecake Dip
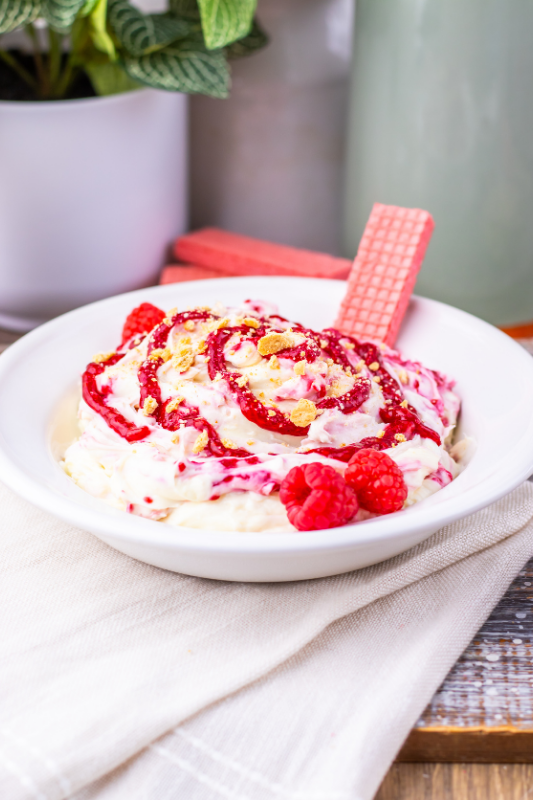
If you need a quick dessert that feels a little special without a lot of effort, this one is always a good choice. It’s smooth, creamy, and just sweet enough, with that lovely raspberry flavor swirled through and a touch of white chocolate that makes it feel extra indulgent. I love serving it with cookies or graham crackers so everyone can scoop up a bite. It’s the kind of simple treat that works beautifully for family movie nights, casual get-togethers, or anytime you want something sweet without turning on the oven.
18. Pumpkin Cheesecake Mini Trifles
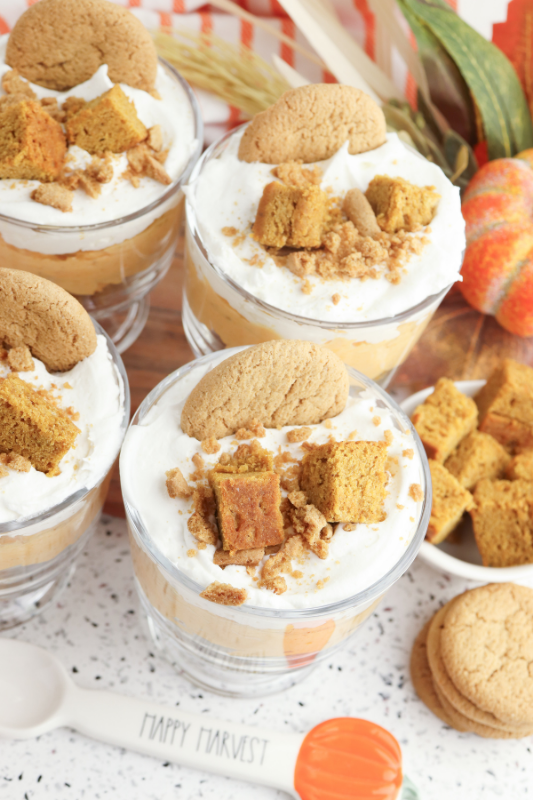
When the weather starts to cool down and the kitchen fills with those warm fall spices, this is the kind of dessert I love putting together. The creamy cheesecake layers pair so nicely with the cozy pumpkin flavor, and the little individual cups make it feel a bit special without any extra fuss. They’re simple to assemble and perfect for gatherings when you want something sweet that everyone can grab and enjoy. It’s a comforting dessert that fits right in on the table after a family meal or during those cozy autumn evenings at home.
GET THE RECIPE19. Peeps Bunny Cheesecake Pudding Cups

When spring rolls around, I always enjoy making a few desserts that feel a little playful for the kids. These sweet little cups are creamy, colorful, and just the kind of treat that brings a smile when they show up on the table. They come together easily and are perfect for Easter gatherings, classroom parties, or a simple family dessert after dinner. With that soft cheesecake-style filling and the cute bunny on top, they’re the sort of fun treat that makes the dessert table feel extra festive.
GET THE RECIPEFrozen Cheesecake Treats
20. Biscoff Cheesecake Ice Cream
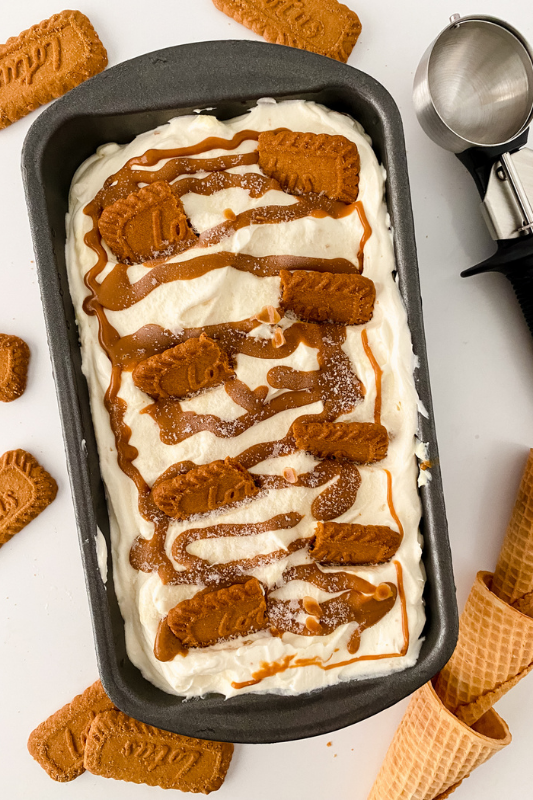
If your family loves those warm, spiced cookie flavors as much as mine does, this is the kind of frozen treat that disappears quickly once it’s scooped into bowls. It’s creamy, rich, and filled with that cozy caramel-like cookie flavor that always feels a little indulgent. I love having desserts like this in the freezer for evenings when everyone wants something sweet but I don’t feel like baking. It’s simple, comforting, and the kind of dessert that makes everyone happy after dinner.
Servings: 8-10
Ingredients:
- 2 Cups Heavy Whipping Cream
- 1 14 Ounce Can Sweetened Condensed Milk
- 1 1/2 cups no bake cheesecake
- 5-7 biscoff cookies
- 1/4 cup biscoff cookie butter
- 1 Tablespoons vanilla extract
Instructions:
-
In a mixing bowl, whip the heavy cream for about 2–3 minutes until it becomes light and frothy.
-
Add the vanilla and sweetened condensed milk, then continue mixing on high speed until soft peaks form.
-
Stir the crushed Biscoff cookies into the whipped mixture until evenly combined.
-
Spoon about one-third of the mixture into your pan and spread it into an even layer.
-
Drizzle melted Biscoff cookie butter over the layer and add a few spoonfuls of no-bake cheesecake filling.
-
Add another layer of the whipped cream mixture and spread it evenly.
-
Top this layer with more Biscoff cookie butter and additional spoonfuls of no-bake cheesecake filling.
-
Finish with a final layer of the whipped cream mixture, followed by more cookie butter and cheesecake filling on top.
-
Cover the pan with plastic wrap and place it in the freezer for at least 6 hours for a softer texture, or 8 hours or longer until fully frozen and ready to serve.
21. Ninja Creami Strawberry Cheesecake Ice Cream
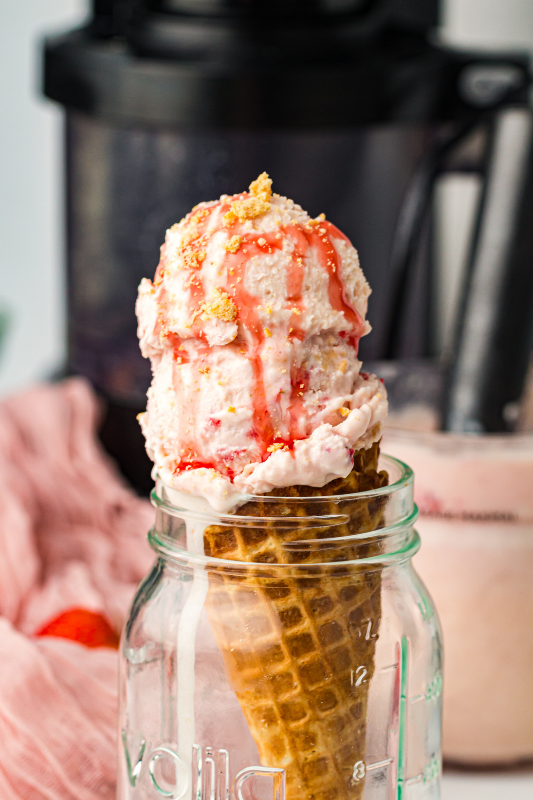
If your family loves a good scoop of ice cream after dinner, this is such a fun way to turn those classic cheesecake flavors into something cool and creamy. The sweet strawberry flavor blends perfectly with the rich, smooth cheesecake base, and it all comes together into a dessert that feels a little special without much fuss. It’s the kind of treat that’s perfect on warm evenings when everyone is looking for something refreshing. Once it’s scooped into bowls, don’t be surprised if everyone comes back asking for just a little more.
Servings: 1 pint
Ingredients:
- 1 cup (240 ml) whole milk
- ¾ cup (180 ml) double cream (heavy cream)
- ⅓ cup (70 g) confectioners’ sugar
- ½ cup (100 g) full-fat cream cheese, softened
- 1 cup chopped fresh strawberries
- ½ tsp vanilla extract
- 1 small vanilla biscuit, crushed (for swirl/topping)
Instructions:
-
Add the whole milk, double cream, confectioners’ sugar, cream cheese, chopped strawberries, and vanilla extract to a blender.
-
Blend until the mixture is completely smooth, making sure there are no lumps of cream cheese remaining.
-
Pour the mixture into a Ninja Creami pint container, leaving a little room at the top for expansion.
-
Place the container flat in the freezer and freeze for 24 hours, or until fully solid.
-
Once frozen, secure the pint in the Ninja Creami and run the Ice Cream cycle.
-
After the first spin, use a spoon to create a small well in the center of the ice cream. Add half of the crushed biscuit and ½ cup chopped strawberries.
-
Run the Mix-In cycle to evenly distribute the biscuit and strawberries throughout.
-
Scoop and serve, then finish with the remaining biscuit crumbs and extra chopped strawberries on top.
Cheesecake desserts have a way of making any day feel a little sweeter. From creamy classics to fun little treats you can share with family and friends, there’s something here for just about every craving. I love having a few simple dessert recipes like these to pull out for gatherings, holidays, or those evenings when everyone is hoping for something sweet after dinner.