
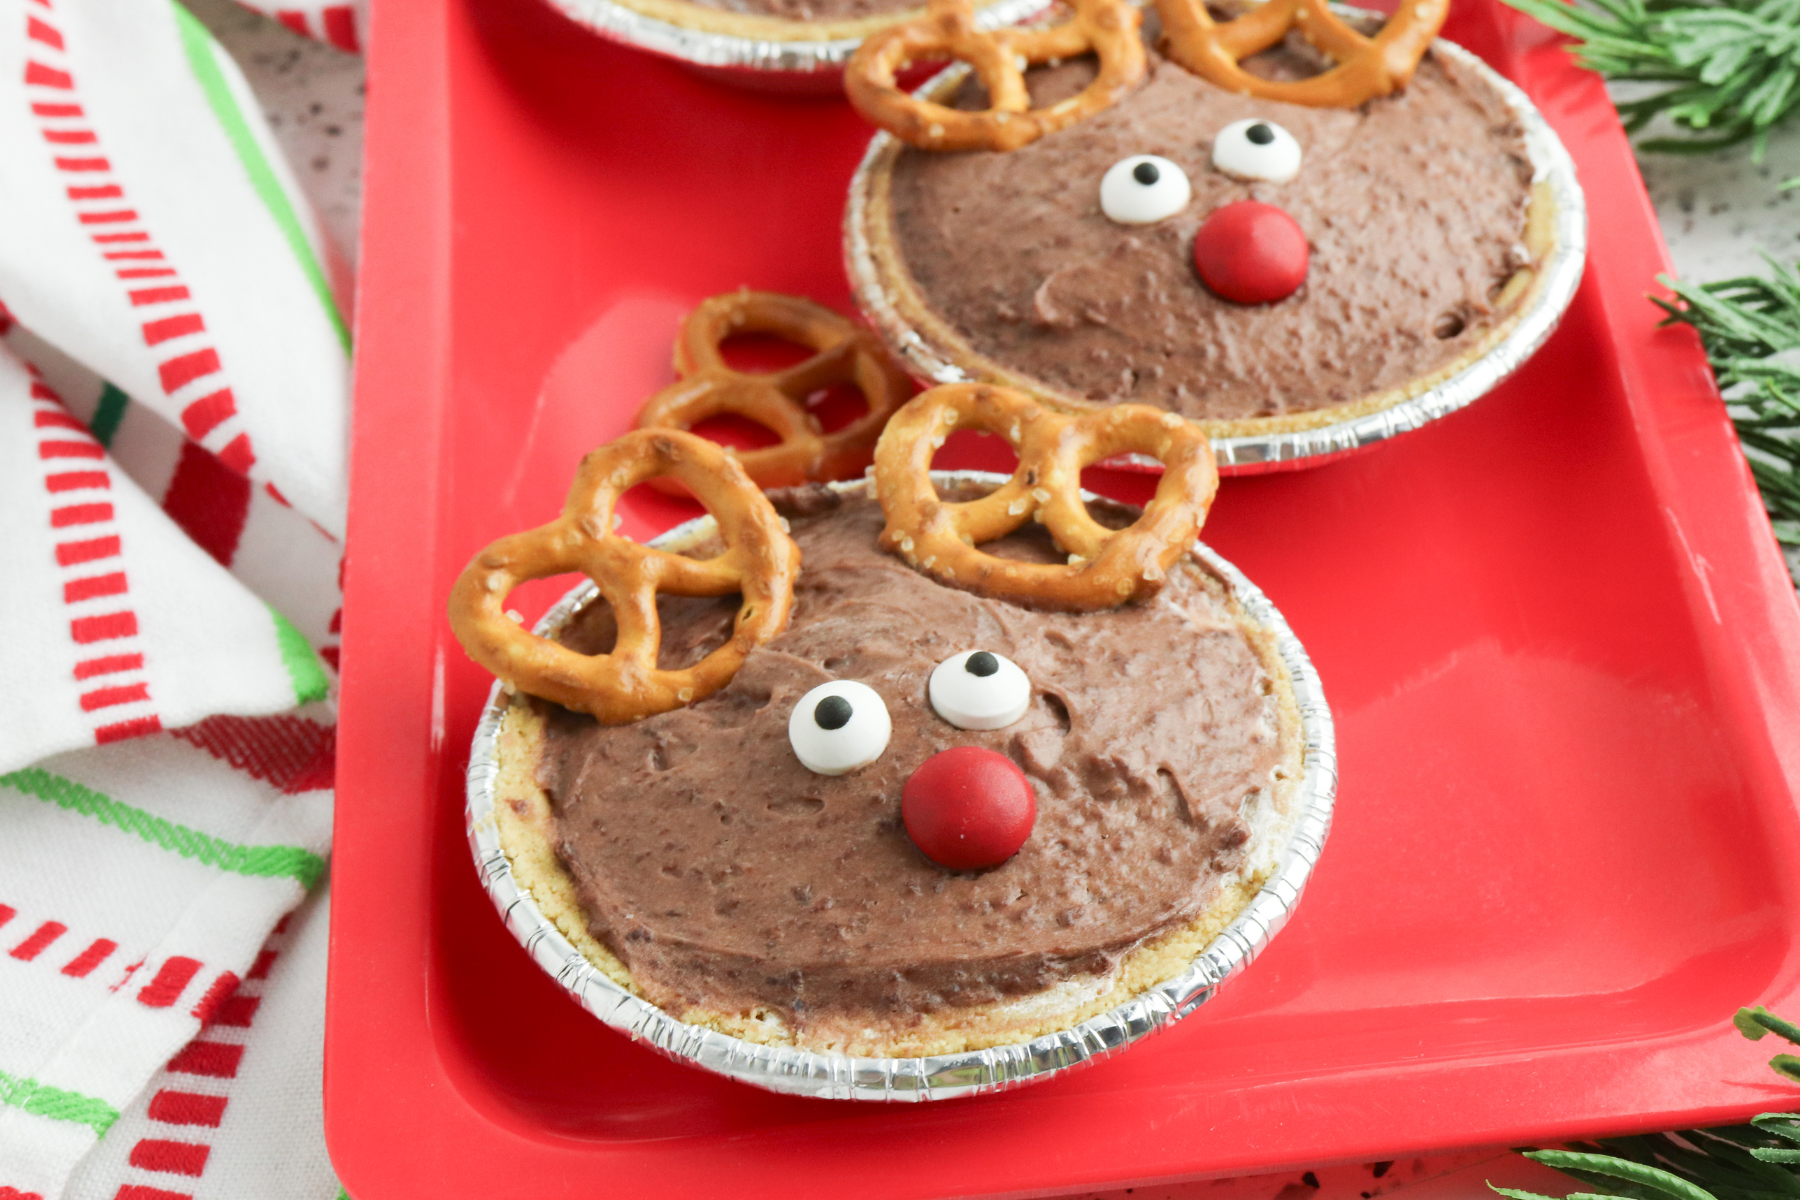
No-Bake Mini Rudolph Pies – Fast, Festive, and Delicious
Every Christmas, I love finding cute and easy treats that make people smile, and these No-Bake Mini Rudolph Pies do exactly that. They’re the kind of dessert that looks like you spent hours in the kitchen, but really, they come together in just a few minutes. Between the creamy chocolate pudding, fluffy whipped topping, and the adorable little faces, they’re always a hit with kids and grown-ups alike.
I first made these on a snowy afternoon when I wanted something festive but didn’t feel like turning on the oven. I had mini pie crusts in the pantry and pudding mix in the cupboard, and before long, a batch of little Rudolphs were chilling in the fridge. When my kids saw them, their eyes lit up, and I knew these were going to become a yearly tradition. It’s the perfect mix of fun and flavor, and the decorating part is half the joy.
These mini pies are also ideal for parties, bake sales, or classroom treats since everyone gets their own little Rudolph. They hold up well in the fridge, so you can make them ahead of time, and they always disappear first from the dessert table. If you’re looking for a fast, festive, and downright delicious treat to add to your holiday lineup, these No-Bake Mini Rudolph Pies are it.
Ingredients
- 6 count mini graham cracker pie crusts – These little crusts make the perfect base for individual holiday treats.
- 1 3.4 oz box chocolate pudding mix – Rich, creamy chocolate pudding gives each pie its delicious filling.
- 1 cup milk – Helps the pudding mix come together for that smooth, velvety texture.
- 1/2 cup heavy cream – Adds extra richness and makes the pudding layer even more decadent.
- 8 ounces frozen whipped topping, thawed – Light and fluffy, it adds the perfect creamy layer on top.
- Mini pretzel twists – These become the cutest little reindeer antlers.
- Candy eyes – Bring your Rudolph pies to life with a fun, playful touch.
- Red M&Ms – Because every Rudolph needs a shiny red nose!

Step-by-Step Instructions
You can find a printable recipe card at the bottom of this post.
1. In a mixing bowl, beat together the pudding mix, milk, and heavy cream until the mixture thickens.

2. Add a spoonful of the pudding mixture to the bottom of each pie crust and spread it out evenly.

3. Top with a small layer of whipped topping, spreading it evenly over the pudding.

4. Divide the remaining pudding mixture between the pies, spreading it to fill each crust.

5. Refrigerate for at least 4 hours to allow the pies to set.
6. Once chilled, decorate each pie with mini pretzel antlers, candy eyes, and a red M&M for the nose.

Tips for Perfect Mini Rudolph Pies
-
Chill the filling well before decorating so the pudding sets nicely and holds its shape.
-
Use cold milk and cream for the best pudding texture and faster thickening.
-
Don’t overfill the crusts or the topping may slide off once you decorate.
-
Smooth each pudding layer with the back of a spoon for a neat, even look.
-
Freeze the pies for 15–20 minutes before decorating if you want the whipped topping to firm up a bit.
-
Add the pretzels just before serving so they stay crisp and don’t get soft from the fridge.
-
Use a piping bag (or a zip-top bag with the corner snipped off) to layer the whipped topping cleanly.
-
Get creative with toppings by using different candies or sprinkles for fun variations.
-
Keep refrigerated until ready to serve to maintain that cool, creamy texture.
-
Make extra! They tend to disappear quickly once they hit the dessert table.

Get Creative!
-
Swap the chocolate pudding for vanilla, butterscotch, or peppermint for a festive twist.
-
Use different candy noses like gumdrops or red Skittles for variety.
-
Add a layer of crushed Oreos or cookie crumbs between the pudding and whipped topping for extra texture.
-
Mix a little peppermint extract into the pudding for a cool, minty flavor.
-
Try mini chocolate pie crusts or vanilla wafer crusts instead of graham cracker ones.
-
Top with a drizzle of chocolate or caramel sauce before decorating.
-
Sprinkle on a bit of edible glitter or gold dust to make your Rudolphs sparkle.
-
Make a mix of Rudolph, Dasher, and Prancer pies by using different colored M&Ms for noses.
-
Turn them into a fun kids’ decorating activity by setting out all the toppings in bowls and letting everyone create their own reindeer.

Serving & Storing
-
Serve chilled straight from the fridge for the best creamy texture.
-
Add decorations just before serving so the pretzels and candy eyes stay crisp.
-
Arrange them on a festive platter with a sprinkle of crushed candy canes or mini marshmallows for a cute presentation.
-
Pair with hot cocoa or peppermint mochas for a cozy holiday dessert spread.
-
Keep leftovers covered in the fridge for up to 3 days.
-
Store in an airtight container if stacking, and use parchment paper between layers to prevent smudging.
-
Avoid freezing fully assembled pies, as the candy and pretzels may lose texture once thawed.
-
Make ahead by preparing the pudding pies a day in advance and decorating right before serving.
-
Pack them in small boxes or cupcake containers for an adorable edible gift idea.


No-Bake Mini Rudolph Pies

These No-Bake Mini Rudolph Pies are the cutest holiday treat you’ll make this season. With layers of creamy chocolate pudding and fluffy whipped topping in a crunchy graham crust, each pie is topped with pretzel antlers, candy eyes, and a red M&M nose. They’re fun, festive, and ready in minutes, making them the perfect easy Christmas dessert for parties or family nights.
Ingredients
- 6 count mini graham cracker pie crusts
- 1 3.4 box chocolate pudding mix
- 1 cup milk
- 1/2 cup heavy cream
- 8 ounces frozen whipped topping, thawed
- Mini pretzel twists
- Candy eyes
- Red M&Ms
Instructions
- In a mixing bowl, beat together the pudding mix, milk, and heavy cream until the mixture thickens.
- Add a spoonful of the pudding mixture to the bottom of each pie crust and spread it out evenly.
- Top with a small layer of whipped topping, spreading it evenly over the pudding.
- Divide the remaining pudding mixture between the pies, spreading it to fill each crust.
- Refrigerate for at least 4 hours to allow the pies to set.
- Once chilled, decorate each pie with mini pretzel antlers, candy eyes, and a red M&M for the nose.


